Surfs Up
So yesterday I worked on a project for a friend and her little guy Ian. I wanted to share with you how I made it. In the past I have made growth charts in many colors and designs from a 2x6 ft board.

But Ian's Mommy had big plans for his room to be a nautical theme (super cute idea ...right?)
So off to Google.com I went to find some Inspiration... (do you do that?)
I found tons of surf board growth charts that were just awesome, but most needed a special saw to cut the shape... ( I think its called a jig saw) so I pitched the idea to Ian's Mommy about an antiqued wooden board with a painted surf board.
Off to Lowes I went to find a wide enough board that wasn't going to be super heavy. My personality tagged along so that he could ride in the race car cart ( he loves yelling directions for the drivers seat)
I found the perfect thing in the finished lumber section. A 6ft board that was 12 inches wide and still only 1 inch thick. ( I was tempted to buy two just in case I messed this one up :/)

Next I drew out on a piece of paper what I wanted it to look like. ( I have NEVER done that before , but in hind sight it did help organize my thoughts before putting brush to wood)
than deep breathe......
I took pencil to wood and measured out my markings

Next I drew the outline of the surf board on the wood and taped out the parts I did not want to be stained. The tape was the most difficult part. Trying to get a curved line out of straight tape was ANNOYING.. But eventually I showed it who was BOSS :)

Can you see where we are going here??
Than I made my secret recipe stain... LoL... If I show you and you leak this recipe I may have to hunt you down (just a fair warning) LOL....
I hate using chemicals so this came about after many tries

Yes that is Elmers glue you see... It actually makes the stain easier to work with and it allows for cleaning once the board is dry.
I mix three colors of acrylic paint... Brown, Tera Cota, and Vanilla in a bowl. I add about a half dollar sized amount of glue and than I add warm water.. Stir and viola... chemical free stain that is washable and safe to use :)

It goes on like Butter..well not butter exactly... more like melty margarine on corn ;)

LET IT DRY ALL THE WAY!!!
than peel off the tape and pick a color for the growth chart part...
Since this is for Ian and his favorite color happens to be yellow ....
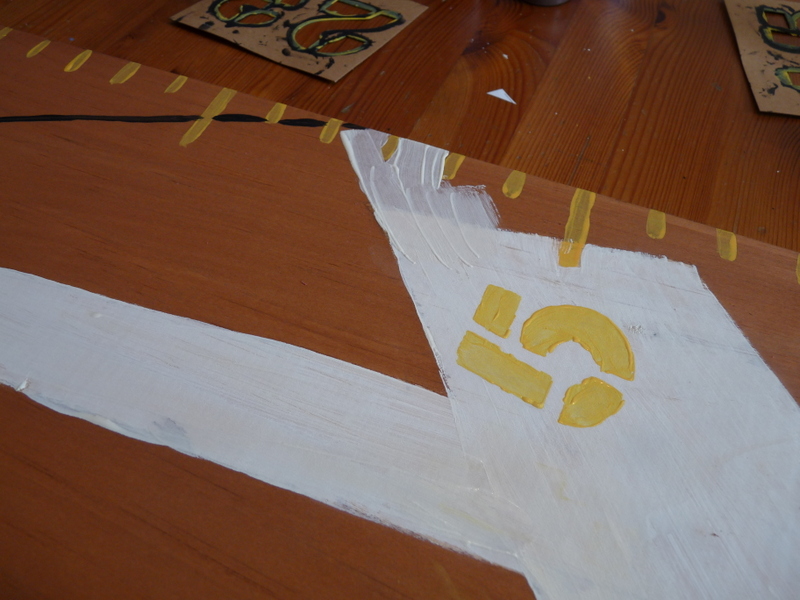
That is exactly what we used :)
Ok... if you are anything like my sister and her amazing ability to pick out the fine details ( I love watching movies with her BTW she can pick out a mic or repeated walking extra in a hot second)
You notice that I made a mistake here... In my sketch on the board I did not make it as wide as it turned out to be... But this is where my brush went when I was painting on the out line of the surf board (stupid brush)
So I had some touch up to do.... no biggie
after painting and waiting for it to dry and painting some more... Ian's surf board was finished
VIOLA

I love how it came out... how about you? And I made the banner out of canvas and twine and burlap. The pictures on them are the actual marina flag letter symbols :0) I can't wait to see the finished big boy room ! Hopefully I will get a picture that I can share with you!
Ok now its your turn to get your beach theme on! Are you ready for Memorial day? I know I am ready to get in the cool pool!
Have a blessed weekend!
Love,
Lilie
 href="http://www.houseofhepworths.com"><img src="http://www.houseofhepworths.com/wp-content/uploads/2010/11/HoHnew1.png" alt="HouseofHepworths" /></a>


<a href='http://www.somewhatsimple.com/' title='Somewhat Simple'><img alt='Somewhat Simple' src='http://www.somewhatsimple.com/wp-content/uploads/2000/01/125-button1.png' /></a>

Super cute!! We appreciate you linking up to our "Strut Your Stuff Saturday." We love seeing all of the great recipes and fun ideas! Hope to see you again next week! -The Sisters
ReplyDelete